Hi all, I won't be posting this week because I'll be out of the country for Thanksgiving. I'm going to meet my littlest brother, who will be three weeks old tomorrow.
In honor of Thanksgiving, just a reminder....
Via Etsy shop The Ink Society
I'm thankful for my education, my freedom, for all of TMI's supporters, and above all, my family. I hope everyone has a great holiday and we will meet again next week. In the meantime, read my Debut Article over on AskMissA.com
These may not look like typical art supplies but they make for a cool project which is really simple and yields one-of-a-kind results. Layer two coffee filters together, fill with coffee grinds and wet the filters. Rub them on the canvas, let dry and repeat.
For added effect, you can drop wet grinds directly onto the canvas, let them leak into it, let sit, then brush off the dried coffee grinds. Or you can wring the wet filters out onto the canvas, and tilt the canvas so the water drips and slides over the canvas, leaving behind an interesting pattern. No two canvases will be the same. Good idea Zach!
I decided to paint lyrics on the canvases and place them above each of our nightstands. The lyrics are from "Home" by Edward Sharpe and the Magnetic Zeros.
Zach's (pictured above) says: "I'll follow you into the park, through the jungle, through the dark, Girl I've never loved one like you. Moats and boats and waterfalls, allweyways and payphone calls. I've been everywhere with you, that's true."
and mine reads:
"Laugh until we think we'll die, barefoot on a summer night, nothing could be sweeter than with you. And in the streets we're running free, like it's only you and me. Geez, you're something to see."
They sound so random but I promise the song is really cute. Proof:
I love how rustic and worn the canvases look. You should try it!
The second DIY is an upholstered bookshelf. Before with boring, cheap wood:
The steps are pretty self explanatory: Lay the bookshelf face down on the floor and remove the back. Upholster the back piece by wrapping fabric around it and stapling around the edges. Cut the extra fabric off and reattach the back to the bookshelf using a staple gun.
I love this project because it allowed me to customize my bookshelf and coordinate it with anything else that can be updated with fabric. I used another two yards of the same fabric as a tablecloth for an unattractive side table, and I can upholster my desk chair with the extra fabric.
Also, check out the cool bookends I scored at a thrift store for $3!
And, finally.....here's a sneak peek at my latest undertaking. My first article should be up on AskMissA.com by the end of this week.
Thanks for reading, and if you haven't signed up to follow me yet, DO IT! Please and thank you :)
What a crazy month! My first online design project is wrapping up, my application is into the magazine editor for review, I've been helping to plan a wedding (not mine) and dealing with a new baby (not mine either), and on top of all that, you may have noticed some changes to the site (more to come). With all of the new ventures I've been undertaking on top of my school work, I have sure been busy. But I can't complain because I know this will all pay off, and I'm excited about the opportunities that could come my way after I add all these things to my resume! I just wanted to remind everyone, if you do what you love and love what you do, it will never feel like work!
Via Etsy shop ConiLab
P.S. Thanks to all my new followers, commenters, and those of you who liked my Facebook company page! There will be some cool new posts about some DIY's Zach and I did over the weekend, coming soon!
There are going to be some exciting things happening around Taylormade Interiors in the coming months. In an effort to add to my portfolio and gain experience, I will be launching a new online design service. My wonderful mother who is in Florida gave me the chance to redesign the outdated lobby of her real estate office, and apparently everyone likes it so much they want me to help with their own homes!
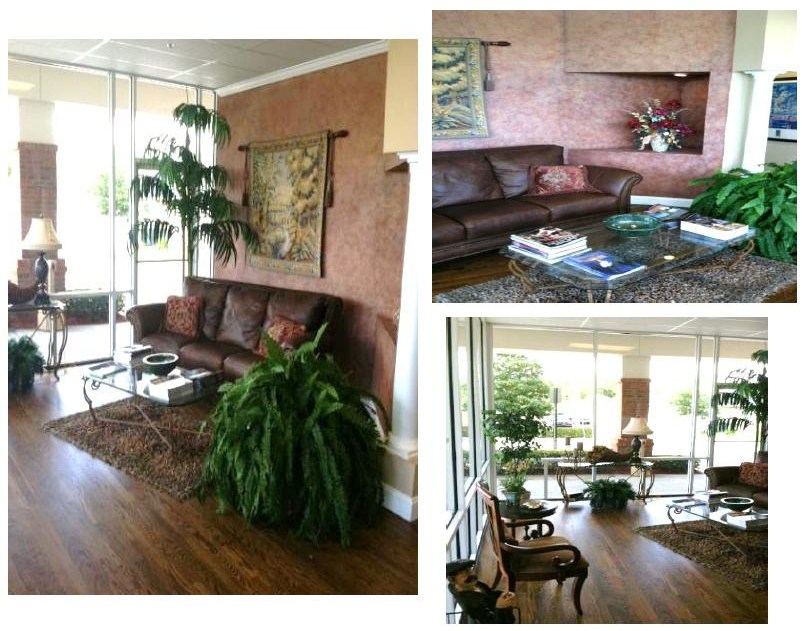
These are some before images of the lobby, and I will have afters very soon!
Since I'm in Chicago, the lobby project was created through our collabration over e-mail. This is how it worked:
First, I received photographs and dimensions of the space to be redesigned. Then we talked about what she wanted to change. In the future, I will have a formal questionnaire to help with identifying our goals. After I knew what the client wanted and needed, I got to work finding pieces that would fit into her budget. I gave her a series of images like the ones below with sources and prices, and let her choose some of her favorites.
In addition to these types of images, I could also do moodboards or maybe even renderings for larger projects. For this type of online design service, there would be a flat fee and I'd be paid through PayPal. So there's nothing to lose- the same low price no matter how large the space! And I'm working on getting discounts for clients from some of my favorite websites.
The idea is that I work closely with the client along the way so that it's a team effort and there are no unpleasant surprises. Online design services are perfect for someone who just needs help getting started, someone who wants to have a hand in the design but needs a push in the right direction.
I need some help with some areas of this before it can become a reality. First of all, I need suggestions for a better name than "online design services." Secondly, I need graphic design help. These are my attempts at a logo:
I know, they're total opposites. I really like the first one since it is simple and pretty gender neutral. But I like the traditional and rustic aspects of the second one. I'm leaning towards the first one because I think the second would take peoples attention away from photos of the interiors. If anyone out there wants to help with a better logo, an eye-catching ad, or a website, please Facebook me or email me at taylormadeinteriors@yahoo.com. Otherwise, just let me know any thoughts or suggestions regarding the logos or the service itself. Thanks for reading!
A few weeks ago, I got the urge to add to my living room. I don't know if it was all the Mad Men I had been watching or the Southern belle in me, but I had to have a bar cart. No good hostess should go without one, and with my family coming into town, we rushed out to buy, assemble and stock (and empty, and re-stock) one right away. I'll show you mine first so it doesn't look so measley after all the inspiration images. After all, I'm not a professional photographer...yet.
I think we did a nice job. The cart and trays are from Ikea. Zach attached the wine glass rack in some special way so it would look like it came that way, but really all the attachments were bought separately. The coral (in my favorite color, turquoise) was a lucky find at Marshall's, but I was too cheap to buy it, so Zach surprised me with it the next day. The other little trinkets are gifts with special meaning to me. And the mirror was stashed away in my closet, but I was desperate to find a place for it and it ties the cart in with the rest of the room nicely.
Here are some images of beautiful and unique bar carts, which I will someday recreate when I'm no longer on an Ikea & Marshalls budget.
Pretty:
Absolutely gorgeous, I have to have both:
Totally cool and unique, if I'd had more time I would have searched til I found the perfect piece to repurpose and put Zach to work. I'm jealous:
The next one is just beautiful. Industrial and nautical at the same time. With some bottles on the floor and a crate on the table, it doesn't look too hoity-toity. And everything looks repurposed, which I love.
And finally...this gem:
See the bar cart way back there? I love this whole room. It's just all my favorite things in one space. A comfy couch, modern chairs, a romantic chandelier and antlers! And...I spy a Kyle Bunting rug!
Moral of the story: Whether you get it at Ikea or an upscale store, or even at a flea market, whether you use it as a side table or a sideboard, whether you put your bottles on a tray or on the floor....you need a designated bar cart or table area in your home. They just make you look like you know how to throw a party. And they're pretty. So to help you get started, here's about a million to choose from.